
1. BRIEF INTRODUCTION
Smart Hanger is a Autodesk® Revit® tool which helps users to place hangers and supports for all MEP curve elements. It can place hangers and supports automatically based on preset rules, maintain relative position between hangers/supports and their hosts, and adjust fixing points to the closest structural elements or levels.

By using Smart Hanger, your work efficiency gets great improvements. And it brings your BIM model detail level to the next level.
2. FEATURES
Smart Hanger has following features:
- Place Hangers on Ducts, Pipes, Cable Trays and Conduits
- Place Supports on Pipes
- Hanger and Support Auto Placement
- Place Specific Hanger/Support Type Based on Host Size
- Hanger and Support Manual Placement
- Support both Imperial and Metric Units
- Support insulated ducts and pipes
- Auto update with its host elements
- Hangers/Supports move with its host
- Disassociated with its host
- Adjust Fixing Points to the Closest Structural Elements
- Adjust Fixing Points to the Closest Level
- Delete associated hangers and supports
3. FEATURE DESCRIPTION
3.1 BASIC FUNCTION
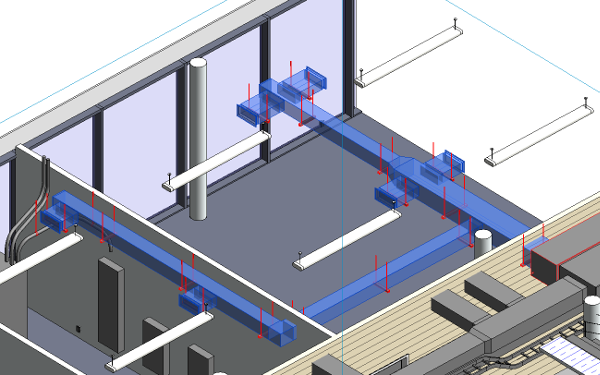
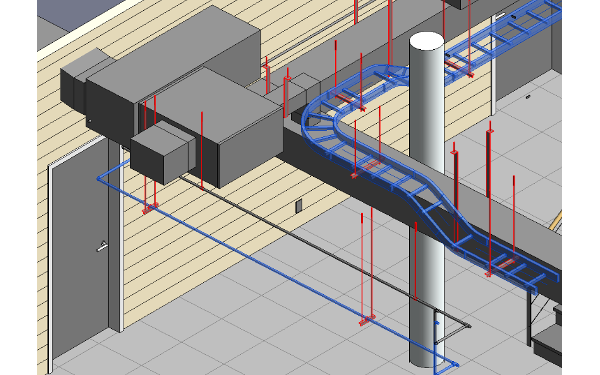
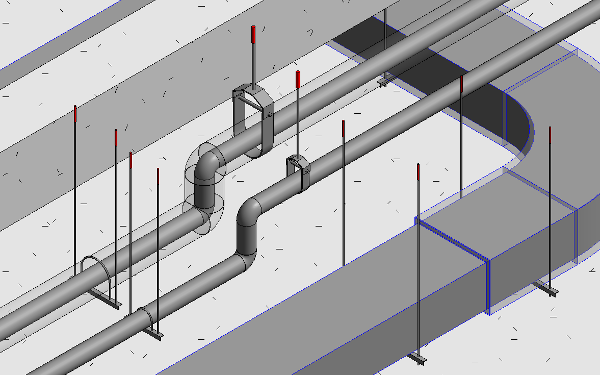
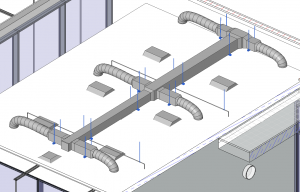
3.1.1 PLACE HANGERS ON DUCTS, PIPES, CABLE TRAYS AND CONDUITS
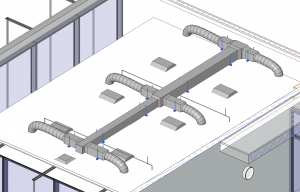
Using Smart Hanger tools, you can place hangers on all kinds of MEP curves, including ducts, pipes, cable trays and conduits.
3.1.2 PLACE SUPPORTS ON PIPES
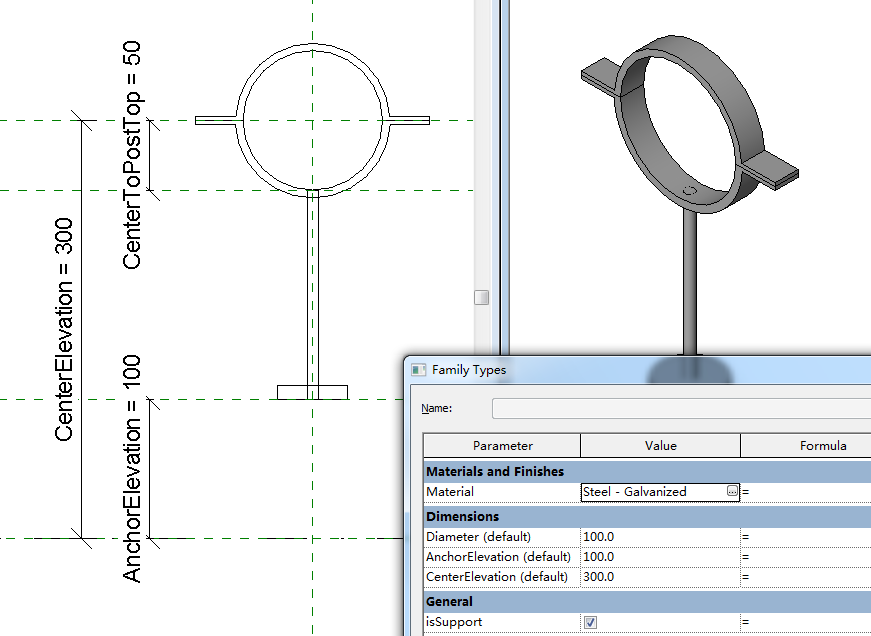
Similar to place hangers, you also can place supports for Pipes using Smart Hanger tools.
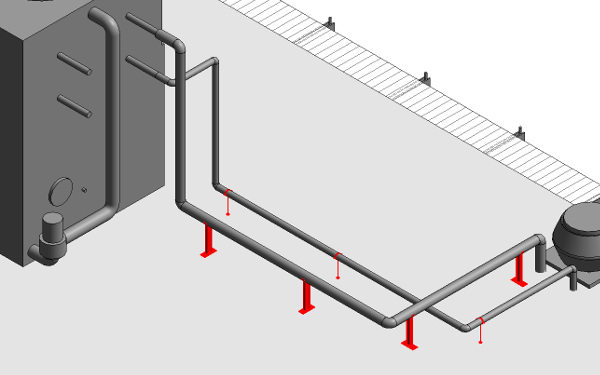
There is a True/False type parameter “isSupport” for Support families. If the family is used as a support, you need to set the “isSupport” parameter to True. Then it can adjust its fixing points downwards to structural elements or levels, when using Adjust Fixing Points command.
3.1.3 HANGER SIZE FOR INSULATED DUCT/PIPE
Hanger size always matches the overall size if the ducts/ pipes get insulated.
If you add insulation for ducts/pipes which already have hanger placed, the hanger size will be updated automatically to suit the insulated ducts/pipe.
3.1.4 SUPPORT BOTH IMPERIAL AND METRIC UNITS
Hanger and support families are located in folder below using default installation: %appdata%\Autodesk\Revit\Addins\2016. There are two sub-folders: Imperial and Metric.
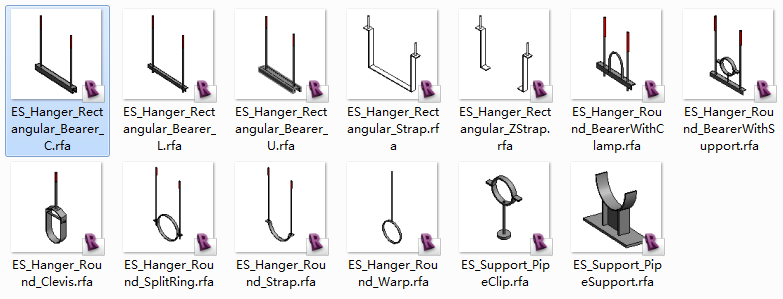
Based on project units of current project, Smart Hanger will select families under corresponding folder to use.
3.2 AUTO PLACEMENT
3.2.1 HANGER AND SUPPORT AUTO PLACEMENT
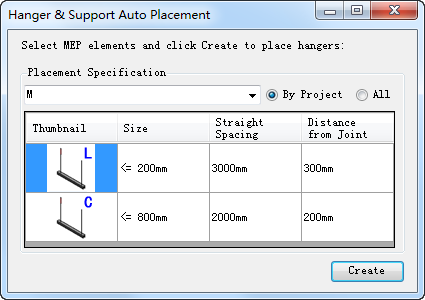
Click “Auto Placement” command to open “Hanger & Support Auto Placement” dialog. Select a Placement Specification from the pull-down list and preview it in the table below. Then select MEP elements and click “Create” to complete hangers/supports automatic placement.
You can click “All” on the right side of Placement Specification pull-down list to show specification of both Imperial and Metric units. Otherwise, it will only show specification which is the same as current project units setting.
Click “Settings” command to open “Hanger& Support Settings” dialog.
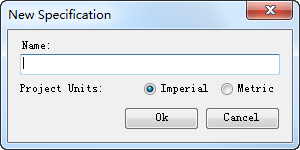
You can create or delete a Placement Specification by clicking commands on the right side of the pull-down list. After click the create command, “New Specification” dialog is opened for you to input a specification name and choice its project units. The project units option will determine where to find hanger/support families.
And you can create, delete or modify a size condition by clicking commands under the specification preview table. You can define which family to use under which size condition. And you can specify the distance between hangers and the distance between MEP element end and hanger.
3.2.2 PLACE SPECIFIC HANGER/SUPPORT TYPE BASED ON HOST SIZE
By creating multiple size condition lines in the Placement Specification, you can choice different hanger/support families for different host size.
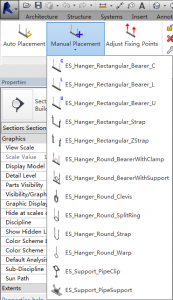
3.3 MANUAL PLACEMENT
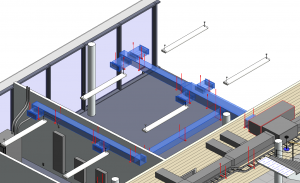
Click Manual Placement command and click any hanger/support family from the list, you can start to place hangers/supports manually by picking points on MEP curve elements until pressing ESC to quit the command.
3.4 AUTO UPDATE WITH ITS HOST ELEMENTS
3.4.1 HANGERS/SUPPORTS MOVE WITH ITS HOST
Hangers and supports placed using both Auto Placement and Manual Placement have association with its host by default. When their hosts are moved, hangers and supports will move together with them until user disassociates them with their hosts.
3.4.2 DISASSOCIATED WITH ITS HOST
If user wants to keep hangers/supports on current position not moving with its host, you can select these hangers/supports and click “Disassociate Hangers” command to disassociate them with their hosts.
After that, you can NOT use “Delete Hangers” command to delete all hangers/supports on selected MEP curve elements. If you do want to delete them, please use general Revit select and delete commands.
3.5 ADJUST FIXING POINTS
Users can adjust all fixing points of hangers and supports by one click.
In “Hanger & Support Settings” dialog, users can specify how to adjust fixing points. It’s an application level setting. There are two options: Adjust to the closest Structural Element or the closest Level.
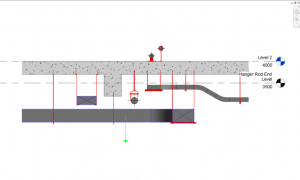
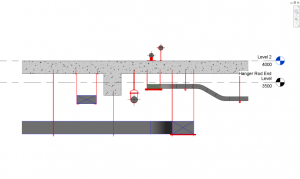
3.5.1 ADJUST FIXING POINTS TO THE CLOSEST STRUCTURAL ELEMENTS
If Fixing Points are set to Structural Element, all hangers and supports will adjust their fixing points to the closest structural elements after clicking Adjust Fixing Points command. For hangers, it searches structural elements upwards, for supports, it searches structural elements downwards.
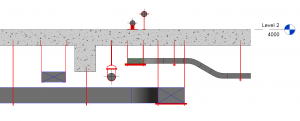
Structural element means elements from below categories:
- Floors
- Roofs
- Stairs
- Structural Foundations
- Structural Framing
- Structural Trusses
3.5.2 ADJUST FIXING POINTS TO THE CLOSEST LEVEL
If Fixing Points are set to Level, all hangers and supports will adjust their fixing points to the closest levels after clicking Adjust Fixing Points command. For hangers, it searches levels upwards, for supports, it searches levels downwards.
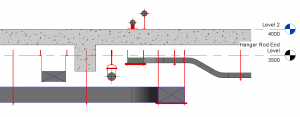
Note: If the structural element or levels are moved after using Adjust Fixing Points command, hanger and support fixing points will NOT move with them. You can use Adjust Fixing Points again to update them.
3.6 DELETE ASSOCIATED HANGERS AND SUPPORTS
Support to delete all hangers and supports which are associated with MEP host elements by one click.

Select the MEP host elements which have associated hangers and support. Click Delete Hangers command to delete them.
If some hangers and supports have been disassociated with their hosts, they will NOT be deleted by this command though they still look like on their hosts. User can select and delete them using general Revit commands.